How to read OBD2 Scanner – Quick Guide
Introduction
As the modern automobile industry advances, the need for an advanced car diagnostic tool has never been more important. That’s where the OBD2 scanner comes in. With the increasingly complex systems in vehicles, the OBD2 scanner has become a must have device for every car owner. In this article, we are going to take a look at how to read OBD2 scanner, so you can use this device to help improve the performance of your car.
The OBD2 scanner is an onboard diagnostic tool that is used to read and clear diagnostic trouble codes (DTCs) from your automobile’s computer. The tool is vital to help identify, analyze, and troubleshoot problems in your car with greater accuracy. Reading an OBD2 scanner is not as complicated as it may seem.
Step 1: Locate the OBD2 Scanner Port
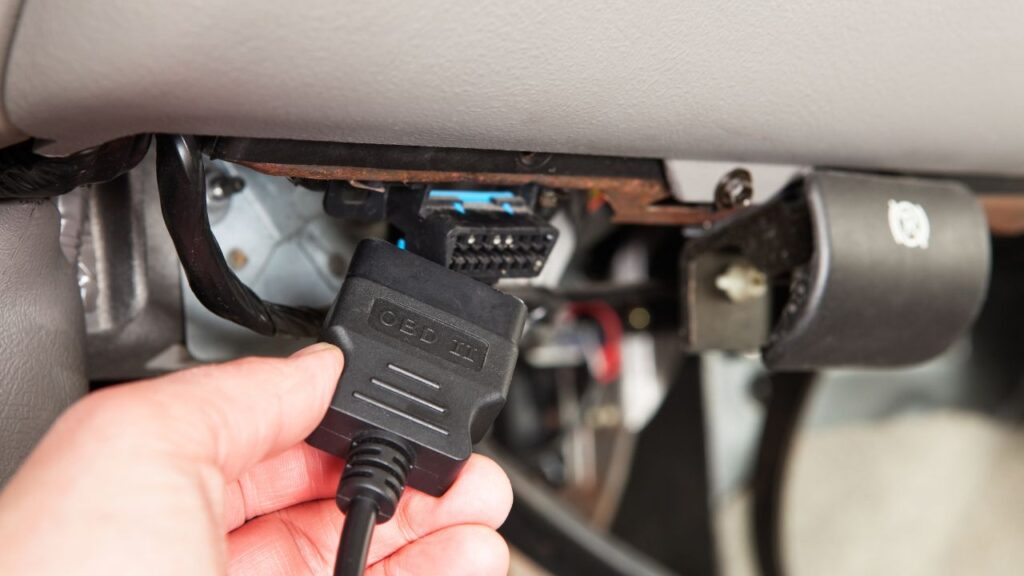
The first step to successfully using an OBD2 scanner is to locate the OBD2 port. This port is typically located on the driver’s side of the vehicle, next to the steering wheel. It is usually located under the dashboard, within arm’s reach of the driver’s seat.
Once you’ve located the port, check to ensure that the OBD2 scanner you have is compatible with your car’s make and model year. You can check this by referring to the user manual or contacting customer service for the brand of your OBD2 scanner.
Step 2: Connect the OBD2 Scanner
The next step is to connect the OBD2 scanner to the OBD2 port. Before you do this, make sure that your car is off and the key is out of the ignition.
Plug the scanner’s connector into the OBD2 port. The scanner should be a snug fit, so make sure to push it in as far as it goes. When the device is connected, the scanner’s display screen will light up.
Step 3: Turn on the Ignition
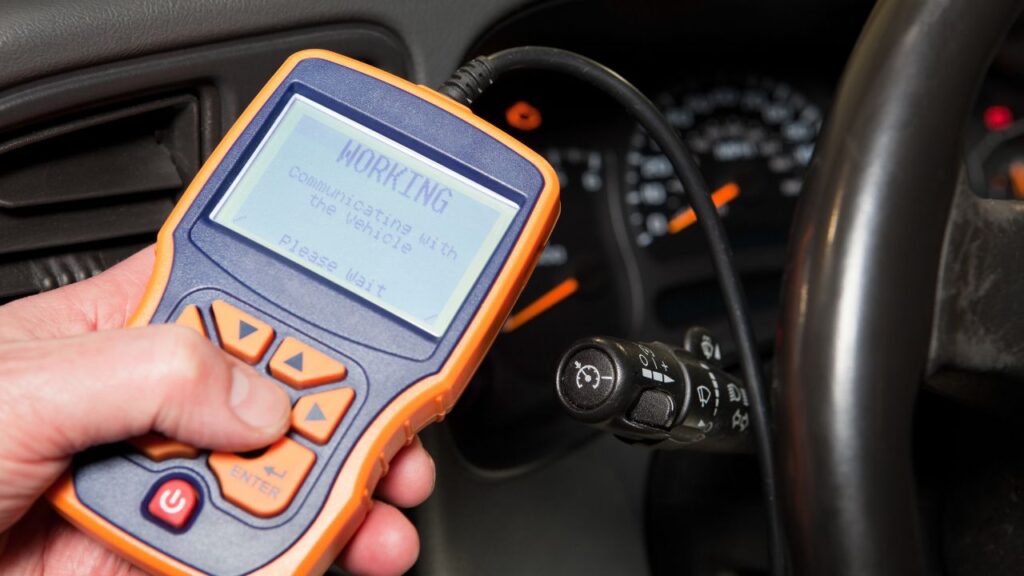
Once the OBD2 scanner is connected, turn on the ignition but do not start the engine. This will help power the scanner and allow it to establish a connection with your car’s computer.
At this stage, the scanner will start to communicate with the vehicle’s on-board computer system, also known as the OBDII. The scanner will retrieve stored data that can help diagnose any issues your car might have.
Step 4: Use the Scanner to Read Codes
After the scanner has established the connection and retrieved data, it’s time to read the codes. To read the codes, use the arrow keys on the scanner to navigate through the menus.
Select the “Read Codes” option from the scanner menu. The scanner will display any error codes that it detects and possibly highlight the root cause of the problem. Ensure that you understand these codes correctly.
The codes will typically consist of a five-digit code. The first letter symbolizes the system that the code pertains to, the following four-digits represent the specific fault. For example, P0700 is a code that represents a transmission control system malfunction.
Step 5: Interpret the Results
After the scanner has read the codes, interpret the results and identify the root cause of the issue. You can identify the root cause of the issue in several ways. Firstly, you can look up the codes in the OBD2 scanner manual. Secondly, you can use the internet to search for a database of the codes.
Once you identify the root cause of the issue, take the necessary corrective measures to fix it. Note that it’s essential to pay attention to minor faults. Failure to fix minor faults could lead to more complex issues and cost more to fix in the long run.
Step 6: Clearing Error Codes
If you’ve fixed the problem in your car, it’s time to clear the codes from the scanner. To do this, select the “Clear Codes” option from the scanner menu. The scanner will prompt you to confirm that you want to delete the codes. Once you confirm, the codes will be cleared from the scanner and the vehicle’s on-board computer.
Clearing the codes resets the system, allowing your car to run optimally. It’s important to note that clearing codes will not fix the issue but will only delete the codes from the memory.
Conclusion
In conclusion, reading an OBD2 scanner can be a simple process if you follow the steps outlined above. Understanding how to use OBD2 scanner can help you diagnose any issues your car may have accurately. With an OBD2 scanner, you can quickly identify and fix any issues, improving your car’s performance and extending its lifespan.
Remember to ensure that you purchase an OBD2 scanner that is compatible with your car’s make and model year. The OBD2 scanner is an investment that can help you save time and money in the long run by diagnosing and fixing issues.
Also Read- Best OBD2 Scanner under $100

With a degree in Electrical Engineering and years of hands-on experience in the tech industry, passionate to provide readers with insightful reviews. From smartphones and laptops to smart home devices and emerging technologies, he navigates the ever-evolving tech landscape, offering in-depth analyses and honest opinions.
![3d_printed_art_01[1]](https://techreviewly.com/wp-content/uploads/2025/08/3d_printed_art_011-300x225.jpeg)
![a_women_wearing_a_smart_watch_01[1]](https://techreviewly.com/wp-content/uploads/2025/08/a_women_wearing_a_smart_watch_011-300x169.jpeg)